Creating a Snake Clone in Rust, with Bevy
19 minutes
Oct 15, 2020Bevy has seen rapid adoption recently, but the learning resources are still fairly scarce. This is an attempt to provide a next step after the Bevy book. The final product looks like this:
It’s about 300 lines of Rust, so buckle in; this is a lengthy walkthrough. If you want to fast-forward to the finished code, the code lives here. For each section there’s a diff at the top, which should make it easier to determine where to place snippets of code, when it’s not clear.
An empty bevy app
We’ll start how the bevy book starts, with an app that does nothing. Run cargo new bevy-snake, then put the following in your main.rs:
use bevy::prelude::*;

fn main() {
    App::new().run();
}
We’ll need to add bevy as a dependency in our Cargo.toml, and because I have
the ability to predict the future of this tutorial, let’s go ahead and add
rand in there too so we have it when the time comes.
// ...

[dependencies]
bevy = "0.7.0"
rand = "0.7.3"
Creating a window
We’re going to be creating a 2D game, which requires a lot of different systems; one to create a window, one to do a render loop, one to handle input, one to handle sprites, etc. Luckily Bevy’s default plugins give us all of that:
fn main() {
    App::new().add_plugins(DefaultPlugins).run();
}
Bevy’s default plugins don’t include a camera though, so let’s insert a 2d camera, which we’ll set up by creating our first system:
fn setup_camera(mut commands: Commands) {
    commands.spawn_bundle(OrthographicCameraBundle::new_2d());
}
Commands is
used to queue up commands to mutate the world and resources. In this case, we’re
spawning a new entity, with 2D camera components. Prepare for some bevy magic:
App::new()
    .add_startup_system(setup_camera) // <--
    .add_plugins(DefaultPlugins)
    .run();
Now that we’ve told Bevy that setup is a startup system, Bevy will call it at
startup with the commands param. Run the app again, and you should get an
empty window like this:
The beginnings of a snake
Let’s try to get a snake head in there. We’ll create our first component:
#[derive(Component)]
struct SnakeHead;
SnakeHead is just an empty struct, it’s sort of like a tag that we’ll put on
an entity, and then we can find that entity later by querying for entities with
the SnakeHead component. We don’t need to anything more besides
#[derive(Component)], and now bevy can use it as a component. Empty structs
like these are a common pattern in Bevy, components often don’t need any state
of their own.
We’ll also create a new color for our snake head:
const SNAKE_HEAD_COLOR: Color = Color::rgb(0.7, 0.7, 0.7);
We’ll now create our snake head entity in a new system, and you can see what using that resource looks like:
fn spawn_snake(mut commands: Commands) {
    commands
        .spawn_bundle(SpriteBundle {
            sprite: Sprite {
                color: SNAKE_HEAD_COLOR,
                ..default()
            },
            transform: Transform {
                scale: Vec3::new(10.0, 10.0, 10.0),
                ..default()
            },
            ..default()
        })
        .insert(SnakeHead);
}
Here we’ve got a new system, which again just requires access to Commands. It
will then spawn a new entity, which will have all the components in a
SpriteBundle, and the SnakeHead component. Two of the components that a
SpriteBundle
provides are Sprite and Transform. We go with the defaults for both, except
to specify the color for the sprite, and the scale for the transform. Let’s
just add that system into our app builder:
.add_startup_system(setup_camera)
.add_startup_system(spawn_snake) // <--
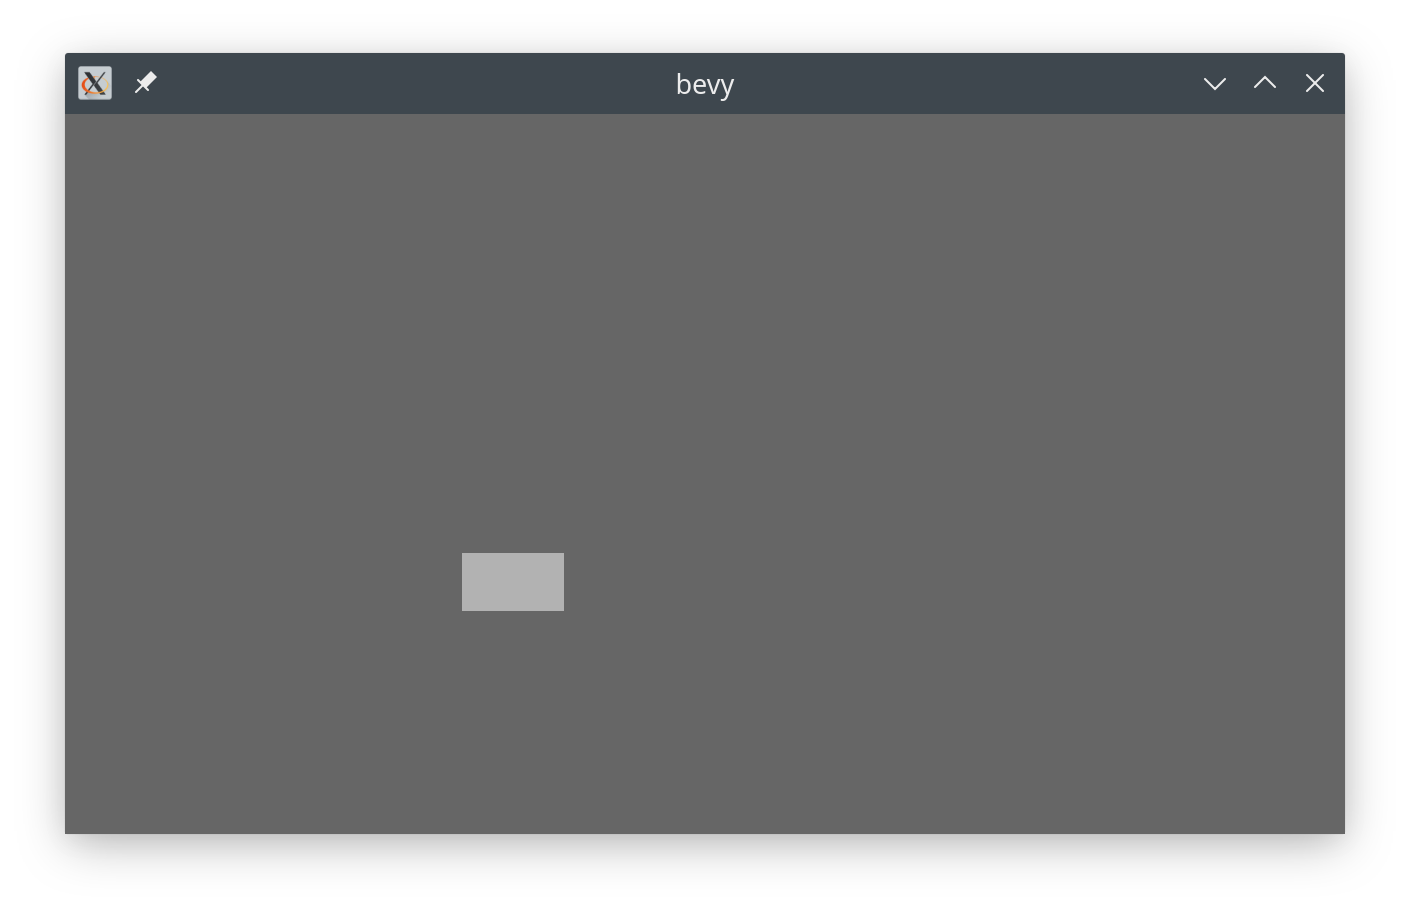
After running this, you should see a snake head in the middle of the screen:
Maybe calling it a snake head is a stretch, you’ll see a 10x10 white sprite.
Moving the snake
Snake isn’t much of a game without movement, so let’s get that head moving. We’ll worry about input later, for now our goal is just to get the head to move. So let’s create a system that will move all snake heads up:
fn snake_movement(mut head_positions: Query<(&SnakeHead, &mut Transform)>) {
    for (_head, mut transform) in head_positions.iter_mut() {
        transform.translation.y += 2.;
    }
}
The main new concept here is that
Query type.
We can use it to iterate through all entities that have both the SnakeHead
component and the Transform component. We don’t have to worry about actually
creating that query, bevy will take care of creating it and calling our
function with it, part of the ECS magic. So let’s add that system in and see
what happens:
.add_system(snake_movement) // <--
.add_plugins(DefaultPlugins)
Here’s what we get, a snake head moving off-screen:
Controlling the snake
Let’s modify our snake movement system to actually allow us to direct the snake:
fn snake_movement(
    keyboard_input: Res<Input<KeyCode>>,
    mut head_positions: Query<&mut Transform, With<SnakeHead>>,
) {
    for mut transform in head_positions.iter_mut() {
        if keyboard_input.pressed(KeyCode::Left) {
            transform.translation.x -= 2.;
        }
        if keyboard_input.pressed(KeyCode::Right) {
            transform.translation.x += 2.;
        }
        if keyboard_input.pressed(KeyCode::Down) {
            transform.translation.y -= 2.;
        }
        if keyboard_input.pressed(KeyCode::Up) {
            transform.translation.y += 2.;
        }
    }
}
Worth noting here is that we’ve changed the query from Query<&SnakeHead, &mut Transform>, to Query<&mut Transform, With<SnakeHead>>. There’s no reason it
had to change now, the old query would have worked fine. I wanted the type
signature to be simpler for the first system example, but now we can write it
the correct way. The reason this is more correct is because we don’t need the
SnakeHead component. So the With type allows us to say “I want entities that
have a snake head, but I don’t care about the snake head component itself, just
give me the transform”. The less components each system needs access to, the
more bevy can parallelize the systems. For example, if another system was
mutating the SnakeHead component, this system couldn’t be run in parallel if
we had the old query.
Now we can control the snake, albeit in very un-snake-like fashion:
Slapping a grid on it
So far we’ve been using window coordinates, and the way that works is that (0,0) is the middle, and the units are pixels. Snake games generally use grids, so if we made our snake game 10x10, our window would be really small. Let’s make our lives a bit easier by using our own positioning and sizing. Then we can use systems that deal with transforming these to window coordinates.
We’ll make our grid 10x10. We’ll define those as constants up at the top of the file:
const ARENA_WIDTH: u32 = 10;
const ARENA_HEIGHT: u32 = 10;
Here are our new structs for positioning/sizing:
#[derive(Component, Clone, Copy, PartialEq, Eq)]
struct Position {
    x: i32,
    y: i32,
}

#[derive(Component)]
struct Size {
    width: f32,
    height: f32,
}
impl Size {
    pub fn square(x: f32) -> Self {
        Self {
            width: x,
            height: x,
        }
    }
}
Fairly straightforward, with a helper method to get a Size with equal width
and height. Position derives some traits that will be useful later, so we don’t
have to keep going back to it. Size could really just have one float, since
all objects will end up having equal width and height, but it feels wrong so I’m
giving it a width and a height. Let’s add those components to the snake head we
spawn:
commands
    .spawn_bundle(SpriteBundle {
        sprite: Sprite {
            color: SNAKE_SEGMENT_COLOR,
            ..default()
        },
        ..default()
    })
    .insert(SnakeHead)
    .insert(Position { x: 3, y: 3 }) // <--
    .insert(Size::square(0.8)); // <--
These components aren’t doing anything currently, let’s start with transforming our sizes into sprite sizes:
fn size_scaling(windows: Res<Windows>, mut q: Query<(&Size, &mut Transform)>) {
    let window = windows.get_primary().unwrap();
    for (sprite_size, mut transform) in q.iter_mut() {
        transform.scale = Vec3::new(
            sprite_size.width / ARENA_WIDTH as f32 * window.width() as f32,
            sprite_size.height / ARENA_HEIGHT as f32 * window.height() as f32,
            1.0,
        );
    }
}
The sizing logic goes like so: if something has a width of 1 in a grid of 40, and the window is 400px across, then it should have a width of 10. Next we can do the positioning system:
fn position_translation(windows: Res<Windows>, mut q: Query<(&Position, &mut Transform)>) {
    fn convert(pos: f32, bound_window: f32, bound_game: f32) -> f32 {
        let tile_size = bound_window / bound_game;
        pos / bound_game * bound_window - (bound_window / 2.) + (tile_size / 2.)
    }
    let window = windows.get_primary().unwrap();
    for (pos, mut transform) in q.iter_mut() {
        transform.translation = Vec3::new(
            convert(pos.x as f32, window.width() as f32, ARENA_WIDTH as f32),
            convert(pos.y as f32, window.height() as f32, ARENA_HEIGHT as f32),
            0.0,
        );
    }
}
The position translation: if an item’s x coordinate is at 5 in our system,
the width in our system is 10, and the window width is 200, then the coordinate
should be 5 / 10 * 200 - 200 / 2. We subtract half the window width because
our coordinate system starts at the bottom left, and Translation starts from the
center. We then add half the size of a single tile, because we want our sprites
bottom left corner to be at the bottom left of a tile, not the center.
Then we’ll add these systems to the app builder. These are a bit of a special
case; they should run in the PostUpdate stage. They need to be in a separate
stage because commands only get executed after each stage, so if we add a new
entity in our Update stage, we need that stage to finish before
position_translation and size_scaling will be able to see that entity.
Here’s what setting that up looks like:
.add_system(snake_movement)
.add_system_set_to_stage(
    CoreStage::PostUpdate,
    SystemSet::new()
        .with_system(position_translation)
        .with_system(size_scaling),
)
.add_plugins(DefaultPlugins)
.run();
Now when you run it, you should get a squished little snake in the bottom left:
Using our grid
Now that we’ve got our grid setup, we need to update our snake_movement
system. Where we were using Transform before, we use Position now:
fn snake_movement(
    keyboard_input: Res<Input<KeyCode>>,
    mut head_positions: Query<&mut Position, With<SnakeHead>>,
) {
    for mut pos in head_positions.iter_mut() {
        if keyboard_input.pressed(KeyCode::Left) {
            pos.x -= 1;
        }
        if keyboard_input.pressed(KeyCode::Right) {
            pos.x += 1;
        }
        if keyboard_input.pressed(KeyCode::Down) {
            pos.y -= 1;
        }
        if keyboard_input.pressed(KeyCode::Up) {
            pos.y += 1;
        }
    }
}
Now our squished snake will follow the grid we’ve created:
Resizing the window
The reason you get a squished snake in the previous step is because the default
window size isn’t square but our grid is, so each coordinate in our grid is
wider than it is tall. There’s a simple fix for that, and that’s creating a
WindowDescriptor resource when we build the app:
    App::new()
        .insert_resource(WindowDescriptor { // <--
            title: "Snake!".to_string(), // <--
            width: 500.0,                 // <--
            height: 500.0,                // <--
            ..default()         // <--
        })
        .add_startup_system(setup_camera)
While we’re at it, let’s change the clear color (aka background color), just to make it look a bit nicer. We’ll add it to the app builder as a resource:
.insert_resource(ClearColor(Color::rgb(0.04, 0.04, 0.04)))
Now we’re back to having a square, and with a darker background:
Spawning food
We’ll add a new color to our constants
const SNAKE_HEAD_COLOR: Color = Color::rgb(0.7, 0.7, 0.7);
const FOOD_COLOR: Color = Color::rgb(1.0, 0.0, 1.0); // <--
We’ll need random so we can place food in random spots, so let’s use that
in advance. We’ll also need FixedTimestep, so go ahead and put that in now so
you don’t have to later:
use rand::prelude::random;
use bevy::core::FixedTimestep;
Then we’ll create a new tag struct, a Food component so we know which
entities are food:
#[derive(Component)]
struct Food;
We’ll then need a system to spawn food:
fn food_spawner(mut commands: Commands) {
    commands
        .spawn_bundle(SpriteBundle {
            sprite: Sprite {
                color: FOOD_COLOR,
                ..default()
            },
            ..default()
        })
        .insert(Food)
        .insert(Position {
            x: (random::<f32>() * ARENA_WIDTH as f32) as i32,
            y: (random::<f32>() * ARENA_HEIGHT as f32) as i32,
        })
        .insert(Size::square(0.8));
}
You probably know what’s next, adding that system to the app builder. But there’s a catch this time. We don’t want this going off constantly. We want to spawn food every second, not every frame. Since this is a common need in game development, to want something to happen at a fixed timestep, bevy provides the ultra-convenient FixedTimestep run criteria. Here’s what using that looks like:
.add_system_set(
    SystemSet::new()
        .with_run_criteria(FixedTimestep::step(1.0))
        .with_system(food_spawner),
)
Somewhat self-explanatory, we’re adding a new set of systems (although there’s only one), which will run at a fixed timestep, in this case every 1 second.
More snake-like movement
We’re going to tackle the snake movement. Specifically, we want the snake to move regardless of whether we’re currently pressing down any keys, and we want it to move every X seconds, not every frame. We’ll be making changes in quite a few areas, so if you’re not sure where something goes, check out the diff button above. We’ll also be tackling system ordering in this section, since we’ve neglected it so far.
The first thing we need to add is a direction enum:
#[derive(PartialEq, Copy, Clone)]
enum Direction {
    Left,
    Up,
    Right,
    Down,
}

impl Direction {
    fn opposite(self) -> Self {
        match self {
            Self::Left => Self::Right,
            Self::Right => Self::Left,
            Self::Up => Self::Down,
            Self::Down => Self::Up,
        }
    }
}
We’ll add this direction to our SnakeHead struct, so it knows which way it’s
going:
struct SnakeHead {
    direction: Direction,
}
We’ll have to instantiate the SnakeHead component with a direction
now, let’s say it starts going up:
.insert(SnakeHead {
    direction: Direction::Up,
})
The snake movement system will run on a fixed timestep, like the food spawning:
.add_system_set(
    SystemSet::new()
        .with_run_criteria(FixedTimestep::step(0.150))
        .with_system(snake_movement),
)
Then we need to run the input system, but we want it to run before the movement system. Bevy has a really ergonomic way to do that:
.add_system(snake_movement_input.before(snake_movement))
So here, for the input system we’re adding .before(snake_movement), to ensure
that on a given frame, we get the user input before we move the snake.
Now we have to actually implement the snake_movement_input and
snake_movement functions. Here are those, I won’t go over them because it’s
just pieces of the old snake_movement function extracted into a new system.
fn snake_movement_input(keyboard_input: Res<Input<KeyCode>>, mut heads: Query<&mut SnakeHead>) {
    if let Some(mut head) = heads.iter_mut().next() {
        let dir: Direction = if keyboard_input.pressed(KeyCode::Left) {
            Direction::Left
        } else if keyboard_input.pressed(KeyCode::Down) {
            Direction::Down
        } else if keyboard_input.pressed(KeyCode::Up) {
            Direction::Up
        } else if keyboard_input.pressed(KeyCode::Right) {
            Direction::Right
        } else {
            head.direction
        };
        if dir != head.direction.opposite() {
            head.direction = dir;
        }
    }
}

fn snake_movement(mut heads: Query<(&mut Position, &SnakeHead)>) {
    if let Some((mut head_pos, head)) = heads.iter_mut().next() {
        match &head.direction {
            Direction::Left => {
                head_pos.x -= 1;
            }
            Direction::Right => {
                head_pos.x += 1;
            }
            Direction::Up => {
                head_pos.y += 1;
            }
            Direction::Down => {
                head_pos.y -= 1;
            }
        };
    }
}
There’s not much in the way of new concepts here, just some boilerplate direction logic. After this you’ll have a snake head that moves a bit more… snake-like:
Adding a tail
The tail of the snake is somewhat complex. For each segment, we need to know
where it needs to go next. The way we’re going to approach this is to put the
snake segments in a Vec, and store that as a resource. That way, when we’re
updating the position of a segment, we can iterate through all the segments and
set the position of each to the position of the segment before it.
We’ll need a new color for these segments, where the two other colors are:
const SNAKE_SEGMENT_COLOR: Color = Color::rgb(0.3, 0.3, 0.3);
A component for our snake segments:
#[derive(Component)]
struct SnakeSegment;
And the resource we talked about for storing the list of segments:
#[derive(Default)]
struct SnakeSegments(Vec<Entity>);
Let’s add that as a resource in our app:
.insert_resource(SnakeSegments::default()) // <--
Since we’re going to be spawning segments from a couple places (when you eat food and when you initialize the snake), we’ll create a helper function:
fn spawn_segment(mut commands: Commands, position: Position) -> Entity {
    commands
        .spawn_bundle(SpriteBundle {
            sprite: Sprite {
                color: SNAKE_SEGMENT_COLOR,
                ..default()
            },
            ..default()
        })
        .insert(SnakeSegment)
        .insert(position)
        .insert(Size::square(0.65))
        .id()
}
This should look very similar to the spawning of the SnakeHead, but instead of
a SnakeHead component, it’s got a SnakeSegment component. Something new here
is that we’re then getting that Entity (which is really just an id), by using
the id function, and returning it so that callers can use it.
Now, we’ll need to modify our game setup function. Instead of just a head, it’s also going to spawn… a snake segment (shocked pikachu meme):
fn spawn_snake(mut commands: Commands, mut segments: ResMut<SnakeSegments>) {
    *segments = SnakeSegments(vec![
        commands
            .spawn_bundle(SpriteBundle {
                sprite: Sprite {
                    color: SNAKE_HEAD_COLOR,
                    ..default()
                },
                ..default()
            })
            .insert(SnakeHead {
                direction: Direction::Up,
            })
            .insert(SnakeSegment)
            .insert(Position { x: 3, y: 3 })
            .insert(Size::square(0.8))
            .id(),
        spawn_segment(commands, Position { x: 3, y: 2 }),
    ]);
}
Our first segment is the head, which you can see now has a .insert(SnakeSegment)
addition. Our second segment comes from our spawn_segment function. Voila,
we’ve got a detached little “tail”:
Making the tail follow the snake
One essential part of the game of snake as I remember it is that the head didn’t
immediately detach from the tail. Let’s see how we can modify our
snake_movement function to be more true to the original game. We’ll need to
change how we get the position of the head, because we can’t have two queries
that are competing for Position components, and we’ll need to have access to
our SnakeSegments resource. Here’s our new function:
fn snake_movement(
    segments: ResMut<SnakeSegments>,
    mut heads: Query<(Entity, &SnakeHead)>,
    mut positions: Query<&mut Position>,
) {
    if let Some((head_entity, head)) = heads.iter_mut().next() {
        let segment_positions = segments
            .iter()
            .map(|e| *positions.get_mut(*e).unwrap())
            .collect::<Vec<Position>>();
        let mut head_pos = positions.get_mut(head_entity).unwrap();
        match &head.direction {
            Direction::Left => {
                head_pos.x -= 1;
            }
            Direction::Right => {
                head_pos.x += 1;
            }
            Direction::Up => {
                head_pos.y += 1;
            }
            Direction::Down => {
                head_pos.y -= 1;
            }
        };
        segment_positions
            .iter()
            .zip(segments.iter().skip(1))
            .for_each(|(pos, segment)| {
                *positions.get_mut(*segment).unwrap() = *pos;
            });
    }
}
There’s a lot going on here. We’re getting the Entity of the snake head this
time, instead of getting its position from a Query. Then we use
positions.get_mut(head_entity).unwrap(), to get the Position of the head.
The segment positions are retrieved in a similar manner, by just iterating over
the segments we have in the SnakeSegments resource, and getting the Position
for each one, from the positions query.
After we change the head position, we just need to set the position of each segment to the position of the segment in front of it. The first tail segment gets set to the head position, second tail segment gets set to the first tail segment position, etc. There’s some fun iterator magic in there, but it’s not bevy-specific so I’m not going to spend too much time on it.
Here’s what we should have now:
Growing the snake
The snake has been taunted by inedible food for long enough. We’re going to add a new system that lets the snake eat food:
fn snake_eating(
    mut commands: Commands,
    mut growth_writer: EventWriter<GrowthEvent>,
    food_positions: Query<(Entity, &Position), With<Food>>,
    head_positions: Query<&Position, With<SnakeHead>>,
) {
    for head_pos in head_positions.iter() {
        for (ent, food_pos) in food_positions.iter() {
            if food_pos == head_pos {
                commands.entity(ent).despawn();
                growth_writer.send(GrowthEvent);
            }
        }
    }
}
Just iterating through all food positions and seeing if they share a position
with the head of the snake. If they do, we remove them using the handy despawn
function, then trigger a GrowthEvent. Let’s create that struct:
struct GrowthEvent;
Using events is a new concept. You can send and recieve events between systems. They can be arbitrary structs so you can include any data you want in your events. For example, you may have one system that sends jump events, then a separate system that processes them. In our case, we’ll have a system that sends growth events, and a growth system to process them. You need to register events, just like we do for resources, systems, etc.:
.add_event::<GrowthEvent>()
Let’s add the snake_eating system too, chained onto the SystemSet that has
our snake_movement system, it should look like this:
SystemSet::new()
    .with_run_criteria(FixedTimestep::step(0.150))
    .with_system(snake_movement)
    .with_system(snake_eating.after(snake_movement))
We want the eating check to happen after movement, so we add
.after(snake_movement) so bevy makes it happen in the right order.
Now the snake should be able to eat food. But it’s just a black hole for now, it doesn’t grow. One thing we need to think about for growing is that we need to know where the last segment was before moving, because that’s where the new segment goes. Let’s create that as a new resource:
#[derive(Default)]
struct LastTailPosition(Option<Position>);
And then down in the app builder:
.insert_resource(LastTailPosition::default())
We need to make a couple very minor modifications to the snake_movement
system, to update that LastTailPosition resource. The first is to add the
resource as a param:
fn snake_movement(
    // ...
    mut last_tail_position: ResMut<LastTailPosition>,
    // ...
The second is to assign that resource to the position of the last segment, this
goes after we iterate through segment_positions:
*last_tail_position = LastTailPosition(Some(*segment_positions.last().unwrap()));
After that the snake growth system is fairly straightforward:
fn snake_growth(
    commands: Commands,
    last_tail_position: Res<LastTailPosition>,
    mut segments: ResMut<SnakeSegments>,
    mut growth_reader: EventReader<GrowthEvent>,
) {
    if growth_reader.iter().next().is_some() {
        segments.push(spawn_segment(commands, last_tail_position.0.unwrap()));
    }
}
Then we’ll just add that system onto the same SystemSet with movement and
eating, and make sure it runs after eating:
.with_system(snake_growth.after(snake_eating))
Hitting the wall (or our tail)
A pretty important part of the game of snake (or any game), is a losing condition. In snake that’s running into your own tail or running into the wall (some newfangled versions wrap the snake around the screen, but that’s not the version I played on my dad’s Nokia, so it’s not proper snake as far as I’m concerned).
struct GameOverEvent;
Now let’s register it as an event in our app builder:
.add_event::<GameOverEvent>()
In our snake_movement system, we want access to the game over event, so we can
send events:
fn snake_movement(
    // ...
    mut game_over_writer: EventWriter<GameOverEvent>,
    // ...
) {
Let’s just take the case of running into a wall first, put this right after the
match &head.direction {...}:
if head_pos.x < 0
    || head_pos.y < 0
    || head_pos.x as u32 >= ARENA_WIDTH
    || head_pos.y as u32 >= ARENA_HEIGHT
{
    game_over_writer.send(GameOverEvent);
}
Alright, so we’ve got our snake_movement system sending game over events.
Let’s create a new system that listens for these events:
fn game_over(
    mut commands: Commands,
    mut reader: EventReader<GameOverEvent>,
    segments_res: ResMut<SnakeSegments>,
    food: Query<Entity, With<Food>>,
    segments: Query<Entity, With<SnakeSegment>>,
) {
    if reader.iter().next().is_some() {
        for ent in food.iter().chain(segments.iter()) {
            commands.entity(ent).despawn();
        }
        spawn_snake(commands, segments_res);
    }
}
The cool thing here is that we can use the spawn_snake function directly. It’s
now being used as both a system and a helper function.
For the final touch to round out our snake game, let’s add the bit of logic we
need to send a game over event when we hit our own tail, inside the
snake_movement system, right after the check for running out of bounds:
if segment_positions.contains(&head_pos) {
    game_over_writer.send(GameOverEvent);
}
And then we’ll add game_over system, and make sure it runs after
Movement:
.add_system(game_over.after(snake_movement))
At last, we have our final result:
Homework
There are two bugs with the game currently.
The first is that you can turn the snake 180°. For example, if the snake is moving right, if you press up on one frame then left on the next frame, the snake will turn around and hit itself.
The second bug is that food can spawn on top of the snake’s tail.
Homework hint/spoiler:
- For the turning problem, part of the problem is that “the direction the snake is moving” and “the last user input”, are stored in the same variable. Being able to keep track of these independently will help.
If you play games, my PSN is mbuffett, always looking for fun people to play with.
If you're into chess, I've made a repertoire builder. It uses statistics from hundreds of millions of games at your level to find the gaps in your repertoire, and uses spaced repetition to quiz you on them.
If you want to support me, you can buy me a coffee.